How To Fix Vertical Lines On A Dual Monitor Setup Windows 11
If you're having trouble with vertical lines appearing on one or both screens in a dual‑monitor configuration, you’re not alone. The issue can stem from drivers, cable connections, or display settings. This guide walks you through the most common causes and provides step‑by‑step solutions to restore a clean, uninterrupted desktop on Windows 11.
Why Vertical Lines Appear
Vertical lines are usually a symptom of one of the following problems:
- Out‑of‑date graphics drivers – Windows 11 relies on the latest driver versions to handle multiple monitors correctly.
- Loose or damaged cables – HDMI, DisplayPort, or DVI connections that aren’t seated properly can generate artifacts.
- Incorrect resolution or refresh rate – Mismatched settings between the two displays can cause rendering glitches.
- Hardware issues – Faulty panels or graphics cards may produce persistent lines that do not disappear after software fixes.
Step‑by‑Step Fixes
1. Verify Cable Connections
- Power down both monitors and your PC.
- Disconnect the video cables (HDMI, DisplayPort, or DVI) from each monitor.
- Inspect the connectors for bent pins or dust, then reconnect them firmly.
- Turn the monitors and PC back on and check if the lines remain.
Even a slight wiggle can cause the issue, so a secure connection is often the quickest remedy.
2. Update Graphics Drivers
- Press Win + X and select Device Manager.
- Expand Display adapters, right‑click your graphics card, and choose Update driver.
- Select Search automatically for drivers. Windows will download and install any newer version.
- For the latest drivers, visit the manufacturer’s website (NVIDIA, AMD, or Intel) and download the Windows 11‑compatible package.
Keeping drivers current is essential, especially after a major Windows update. An Update often resolves both vertical and horizontal artifacts.
3. Adjust Display Settings
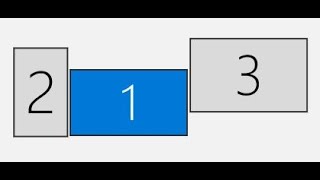
- Right‑click the desktop and choose Display settings.
- Under Multiple displays, ensure the correct monitor is selected.
- Set each screen to its native resolution and matching refresh rate (usually 60 Hz or higher).
- Click Advanced display settings and verify the Color format is set to RGB, not YUV.
Incorrect resolution can produce Fix Horizontal lines as well, so double‑check both axes.
4. Run Windows 11 Troubleshooter
- Open